
My Mom’s been making homemade yogurt for years. My parents have a dairy farm, so fresh milk is readily available. My son loves plain yogurt, and we go through it so much, that I decided I wanted to start making my own yogurt as well. So many recipes require a thermometer and seem fairly finicky. I asked my Mom how she did it, as she doesn’t measure the temperature of the milk and gets great yogurt. It’s actually really quite simple.

Start with putting 2L of whole milk in a pot on the stove on high (not a turbo boil setting – just regular high). I’ve learned it works best in a pot with a thicker bottom, as the milk is much less likely to burn to the bottom.

When the milk starts to form a skin on the top and bubbles appear, it is about ready to be taken off the stove (approx. 20min). Fill your sink with cold water.

Place the pot of milk in the cold water for 4 minutes. This should cool it to the perfect temperature for your yogurt starter. After the four minutes are over, add your starter (I used whole milk plain yogurt from the store that had live cultures in it – live cultures are a must). You don’t need a whole lot of starter. About 2-3 tsp should be enough.

Transfer your yogurt from the pan and into storage containers of your choice. I have Mason jars handy, so I use them. My Mom has a nice Tupperware container that she uses. Put your yogurt in the oven with the light on. This will give your yogurt the ideal temperature it needs. Leave it there for 12-24 hours (sometimes it can just take longer to thicken up). Refrigerate, and enjoy!

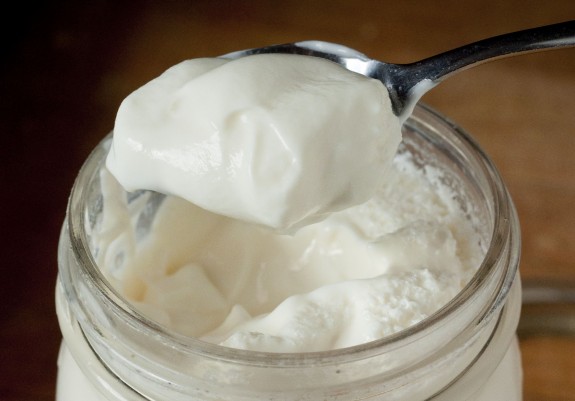
For thicker, Greek-style yogurt, you can drain some of the whey out of your yogurt by placing it in a coffee filter which has been placed in a sieve. Be sure to place the sieve over a bowl. Let the whey drain out of the yogurt for 2 hours. Note: You will have much less yogurt after this process.

we usually drain whey every time we eat yogurt, so it gets a little thicker every day
LikeLike